
Introduction to Makeup Application
Makeup is an art, a powerful tool that can enhance your natural beauty and express your unique style. Whether you’re prepping for a big night out or simply looking to perfect your everyday look, mastering the techniques of makeup application can be game-changing. From the subtle glow of BB cream to the boldness of winged eyeliner, every step counts in creating a flawless finish.
But where do you start? With countless products and methods available, it’s easy to feel overwhelmed. Fear not! This guide will walk you through essential tips and tricks for every stage of makeup application. You’ll discover how important prep work is, learn about foundation hacks that make skin look radiant, and explore eye makeup techniques that truly stand out.
Get ready to unlock your inner artist as we dive into the essentials needed for incredible makeup looks—because everyone deserves to feel beautiful and confident in their own skin!

Makeup is more than just a routine; it’s an art form that allows you to express your individuality. Whether you’re prepping for a night out, heading to work, or simply want to enhance your natural beauty, knowing how to apply makeup flawlessly can make all the difference. From choosing the right BB cream that suits your skin type to mastering essential make up tools, every step counts in achieving that polished look.
With so many products and techniques available, it can be overwhelming at first. Don’t worry; this guide will break down each stage of makeup application into simple tips and tricks. You’ll learn not only how to create stunning looks but also how to feel confident while doing it. So grab your favorite brushes and let’s dive into the world of flawless makeup!
The Importance of Prep and Prime
Great makeup starts with a solid foundation, and that begins long before the first brushstroke. Prep and prime are essential steps that many often overlook.
Cleansing your skin creates a fresh canvas. It removes dirt and excess oils, allowing products to adhere better. Follow this with hydration; a good moisturizer can make all the difference in how your makeup looks throughout the day.
Primers play a critical role too. They blur imperfections, minimize pores, and help control shine. A quality primer acts as glue for your makeup, ensuring longevity.
Using BB cream provides an added layer of protection while offering light coverage and hydration in one step. This multitasker simplifies morning routines without sacrificing results.
Don’t rush these initial steps—they set the tone for everything else to come! Proper prep lays down the groundwork for flawless application, making each product perform at its best.
Prep and prime are crucial steps that can make or break your makeup application. Investing time in these initial stages will pay off with a flawless finish.
Start by cleansing your face to remove any dirt or oil. This creates a clean canvas for your makeup. Follow up with a moisturizer suited to your skin type. A hydrated face allows BB cream and other products to glide on smoothly, ensuring an even application.
Next, using a primer is key. It helps fill in fine lines and pores while creating a barrier between your skin and makeup. Choose one that aligns with your needs—mattifying for oily skin, hydrating for dry complexions, or illuminating if you seek a glow.
After prepping the skin properly, apply BB cream as it offers light coverage while providing skincare benefits too! Use the right make up tools such as beauty blenders or brushes for seamless blending; this ensures there are no streaks or patches left behind.
Remember, the foundation of great makeup lies not just in products but also in how well you prepare beforehand. Prioritize prep work so you can enjoy beautifully applied makeup every day without hassle.
Foundation and Concealer Techniques
Finding the right foundation is key to a flawless makeup look. Choose a shade that matches your skin tone perfectly. Test it on your jawline for an accurate match.
When applying foundation, use a damp beauty sponge or a brush for even coverage. Start in the center of your face and blend outward. This technique ensures you avoid excess product around the edges.
For concealer, select one that’s one shade lighter than your foundation. Apply it under your eyes in an inverted triangle shape to brighten up that area. Use gentle tapping motions with your finger or sponge to blend well.

Don’t forget those pesky blemishes! A small brush works wonders here—just dab and blend until seamless.
Setting everything with powder can help maintain longevity throughout the day, especially if you’re using BB cream instead of traditional foundation for a lighter finish.
When it comes to achieving a flawless makeup look, mastering foundation and concealer application is crucial. Start by selecting the right type of foundation for your skin type. Whether you prefer liquid, cream, or BB cream, make sure it complements your complexion.
Using a make up tool like a damp beauty sponge can help blend your foundation seamlessly into the skin. Dabbing rather than wiping ensures even coverage without disturbing the layers beneath. For those with blemishes or dark circles, concealer is essential. Opt for a thicker formula that matches your skin tone.
Apply concealer in small dots on problem areas and blend carefully using either your finger or a brush designed for detail work. Remember to set everything with powder if you have oily skin; this helps keep shine at bay throughout the day.
By focusing on these techniques—and remembering that practice makes perfect—you’ll be well on your way to mastering flawless makeup application from start to finish. Embrace each step of the process as an opportunity to express yourself through artful enhancement!
Tips for Perfectly Applied Eyeshadow
Eyeshadow application can elevate your entire makeup look. Start with a good primer to ensure longevity and vibrancy of colors. This step is essential for a smooth canvas.
When choosing shades, consider the shape of your eyes. For hooded lids, apply darker shades on the outer corners to create depth. Blend well using a fluffy brush; this makes all the difference.
Use lighter tones on your brow bone and inner corners to brighten up your eyes. Don’t forget about transition shades; they help in blending darker hues seamlessly into the crease.
For added drama, consider layering different textures—like matte with shimmer—to enhance dimension. Always tap off excess product from brushes before applying to avoid fallout.
Practice patience and don’t rush through it! Experimenting will lead you closer to that perfect eyeshadow technique you desire.
Eyeshadow can elevate your makeup look, adding depth and drama. To achieve perfectly applied eyeshadow, start with a good primer. A quality eyeshadow primer helps the pigment adhere better and prevents creasing throughout the day.
Choose the right brushes for application. Flat brushes are great for packing on color, while fluffy blending brushes work wonders to create seamless transitions between shades. Remember to tap off excess product before applying; this avoids fallout that can ruin an otherwise flawless complexion.

When selecting colors, consider your eye shape and skin tone. For daytime looks, opt for softer hues like taupes or pastels. In contrast, bolder colors work well for evening events or special occasions.
Blend is key—never underestimate its power! Take your time when layering different shades to ensure everything melds together beautifully. If you’re unsure about how bold is too bold, start light and build up gradually.
A little bit of shimmer in the inner corner or under the brow bone can brighten your eyes significantly without overwhelming them. Always set your look with a finishing spray to lock it all in place.
With these tips in hand, mastering flawless makeup application feels more achievable than ever.
Achieving the Perfect Winged Liner
Winged liner can elevate any makeup look. The key is precision and practice. Start with a clean, well-prepped eyelid to ensure smooth application.
Using a felt-tip eyeliner pen or gel liner gives you control. Begin by drawing a thin line along your upper lash line. As you reach the outer corner, flick it upwards at an angle that complements your eye shape.
To achieve symmetry, use tape or a business card as a guide for both eyes. This helps create that perfect sharp edge without the hassle of cleanup later.
If you make mistakes, don’t fret! A cotton swab dipped in makeup remover can easily fix any errors. For added drama, consider layering mascara after applying your winged liner.
Experiment with different thicknesses and lengths until you find what suits you best. Winged eyeliner is all about expressing yourself while enhancing your natural beauty.
Achieving the perfect winged liner can feel like an art form. Many makeup enthusiasts struggle with this iconic look, but with a few tips and tricks, you can master it in no time.
Start by choosing the right product for your winged liner. Gel liners offer great precision, while liquid liners provide a bold finish. If you’re new to winged liner, consider using a pencil eyeliner first to map out your shape before going in with something more permanent.
To create that flawless flick, begin at the outer corner of your eye and draw a small line extending towards the end of your brow. This will serve as your guide for how far out to extend your eyeliner. Next, connect that line back to the middle of your eyelid using short strokes. Take it slow—patience is key here.
For those who love BB cream for their base makeup routine, remember that less is often more when it comes to eyeliner application too! You don’t need thick layers; just build gradually until you achieve the desired intensity and thickness.
A common mistake is applying too much pressure on your make up tool while creating wings; instead, use light hands for smoother lines. If there are any mistakes or unevenness after finishing up one side, don’t fret! A cotton swab dipped in micellar water can help clean up edges effortlessly.
Remember—the beauty of winged liner lies in its personalized touch so embrace what works best for you! With practice and these simple strategies under your belt, achieving that enviable cat-eye effect will become second nature before you know it. So grab those tools and get ready to elevate every look with perfectly applied winged liner!
How to Master the Art of Blush and Contouring
Blush and contour are your secret weapons for sculpting the face. Start with a matte bronzer to define your cheekbones. Apply it where shadows naturally fall—underneath the cheekbone, along the jawline, and on the temples.
Use a fluffy brush for blending. This technique softens harsh lines, creating a seamless look. Remember to keep it light; less is often more.
For blush, choose a shade that complements your skin tone. Smile slightly and apply it to the apples of your cheeks, sweeping back towards your hairline for that natural flush.
Don’t forget about highlighter! A touch on the tops of your cheekbones will bring vitality to your complexion.
Practice makes perfect here; experiment with placement until you find what enhances your features best. The key lies in balance—too much can overwhelm while just enough brings life to any makeup look.
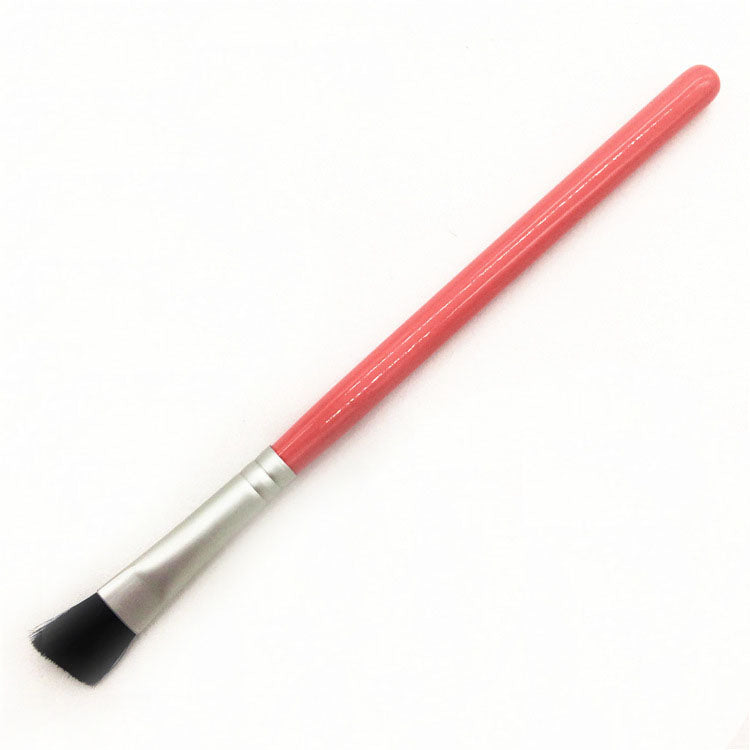
Blush and contouring can transform your makeup look, adding depth and dimension to your face. To start, choose a blush that complements your skin tone—peachy tones work well for warm undertones, while pinks suit cooler complexions.
When applying blush, use a fluffy brush to sweep the product onto the apples of your cheeks. Smile gently to find this area easily. Blend it upward toward your temples for a natural flush. Remember, less is more; you can always add more if needed.
Contouring enhances features by creating shadows where needed. Use a matte bronzer or contour powder two shades darker than your skin tone. Apply it under the cheekbones, along the jawline, and on either side of the nose for subtle definition.
To blend everything seamlessly, use a clean makeup sponge or brush in circular motions over both blush and contour areas. This blending technique softens harsh lines and creates an effortless finish.
Don’t forget about highlighter! A touch on top of the cheekbones will bring luminosity to your complexion. The right balance of blush, contouring products like BB cream for coverage with make up tools ensures you achieve that sought-after glow without looking heavy-handed.
Experimentation is key here; practice until you find what works best for you! Embrace these tips as part of your beauty routine and see how they elevate any look from ordinary to extraordinary.
The Finishing Touch: Lipstick and Highlighter
Lipstick and highlighter are the cherry on top of any makeup look. They bring everything together and add that extra flair.
Choosing the right lipstick shade can transform your appearance. Whether you prefer a bold red or a soft nude, find a color that complements your skin tone. Don’t shy away from experimenting with textures—matte, glossy, or satin finishes each offer unique vibes.
Highlighter is equally important for achieving that sought-after glow. Apply it to the high points of your face: cheekbones, brow bones, and down the bridge of your nose. A little goes a long way; build up gradually to avoid an unintentional disco ball effect.
Layering these elements thoughtfully enhances features without overshadowing them. Remember to blend well for seamless results. With just these two products, you can elevate even the simplest looks into something truly stunning!
The last step in your makeup routine can elevate your look from simple to stunning. Lipstick and highlighter are the final touches that bring everything together.
Start with lipstick. Choose a shade that complements your overall makeup theme. Whether you prefer bold reds, soft pinks, or nude tones, find a formula that works for you—be it matte, satin, or glossy. For long-lasting wear, consider using a lip liner to define your lips before applying color. This helps prevent feathering and gives structure to the mouth.
Next up is highlighter. Applying this product correctly can give you that coveted glow from within look. Use a fan brush or your fingertip to apply highlighter on the high points of your face: cheekbones, brow bones, down the bridge of your nose, and even on the cupid’s bow for extra definition.
Don’t forget about blending! Smooth transitions between products create an effortless finish. And remember: less is more when it comes to highlighters; build up gradually until you achieve just the right amount of radiance.
With these tips in hand—from prep and prime through to flawless application—you’re well on your way to mastering every aspect of makeup artistry at home! Enjoy exploring different looks as you refine techniques with each application—your skills will only improve over time!

Common Mistakes to Avoid
When it comes to makeup application, avoiding common pitfalls can make a world of difference. One frequent mistake is using too much product. Less is often more, especially with foundation and concealer. Opt for a BB cream for lightweight coverage that still evens out your skin tone.
Another misstep is neglecting skin prep. Skipping moisturizer or primer can lead to uneven application and patchiness throughout the day.
Blending poorly is another issue many struggle with. Invest time in making sure every layer melds seamlessly into the next, particularly around areas like the jawline and hairline.
Don’t overlook your tools. Dirty brushes can harbor bacteria and affect how products apply on your face. Regularly cleaning them not only enhances performance but also keeps your skin healthy. Pay attention to these details for a flawless finish each time you sit down to do your makeup!
Must-Have Tools for Flawless Makeup
The right tools can transform your makeup game. Investing in quality brushes is essential. A good foundation brush or sponge ensures an even application of BB cream, letting your skin glow naturally.
Don’t underestimate the power of a beauty blender. It seamlessly blends concealer and foundation for a flawless finish.
For eyeshadow, consider a variety of brushes: flat ones for packing on color and fluffy ones for blending. The right shape makes all the difference.
Another must-have tool is an eyelash curler to enhance your lashes before mascara application.
Keep cotton swabs handy for quick fixes along the way. They are perfect for correcting any minor mistakes without starting over completely.
With these tools in hand, you’re well-equipped to create stunning looks every time you sit down at your vanity mirror.
Having the right tools is essential for achieving a flawless makeup look. Investing in quality make up tools can make all the difference in how your products apply and wear throughout the day.
Start with brushes. A good set should include basic options like foundation, concealer, eyeshadow, and blush brushes. Each type has its unique bristle texture that helps to blend and layer products seamlessly. For precision work, consider adding smaller detail brushes as well.
Sponges are another must-have tool for any makeup enthusiast. A damp beauty sponge can help you achieve an airbrushed finish when applying BB cream or liquid foundations. They also excel at blending out concealers under your eyes.
Don’t overlook applicators like eyelash curlers and brow grooming tools either! These small items play a significant role in enhancing features without much effort.
Keep a good setting spray handy; it locks everything into place while ensuring longevity throughout the day or night.
When equipped with these essentials, you’ll find that each step of your makeup application becomes smoother and more enjoyable—leading to stunning results every time.

Conclusion
Achieving flawless makeup application is an art that combines technique, practice, and the right tools. From prepping your skin to choosing the best BB cream, every step counts towards a polished look. Remember to focus on blending techniques for foundation and concealer while also perfecting your eyeshadow skills.
Don’t overlook the importance of mastering eyeliner—especially when it comes to achieving that perfect winged liner. Blush and contour are essential for adding dimension to your face, so practicing these applications can elevate your overall appearance.
As you finish off with lipstick and highlighter, keep in mind that common mistakes can be easily avoided with awareness and patience. Investing in quality make up tools will make a significant difference in how seamlessly you apply each product.
With these tips and tricks at hand, you’re well on your way to becoming proficient in makeup application! Embrace the creativity this beauty routine offers; it’s all about expressing yourself through color and texture. Happy applying!


